Dive in below to go into detail about how to install metal roofs
Installing a standing seam metal roof is a significant project that can transform your property’s aesthetics and provide long-lasting protection. Whether you’re a seasoned DIY enthusiast or planning to hire a professional, understanding the installation process is crucial. In this comprehensive guide, we will take you through the step-by-step process of installing a standing seam metal roof. From preparing your roof and materials to the finishing touches, we’ve got you covered. Let’s dive into the world of standing seam metal roofing and discover how to achieve a durable and stylish roof that can withstand the test of time.
Understanding Standing Seam Metal Roofing
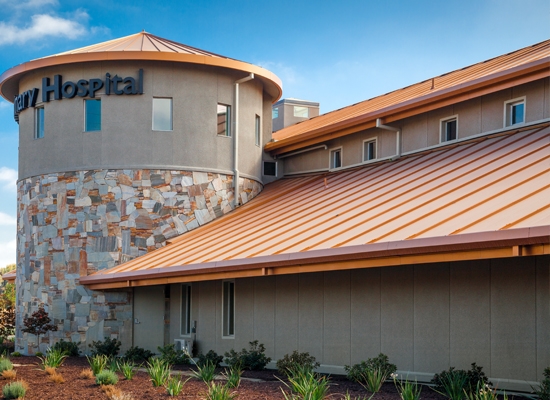
Standing seam metal roofing is a popular choice for homeowners and commercial property owners, and for good reason. Its distinct design and exceptional durability set it apart from traditional roofing options. Let’s delve into the essential aspects of standing seam metal roofing to gain a deeper understanding of what makes it a top choice for those seeking a reliable and stylish roof.
Benefits of Standing Seam Metal Roofs
The benefits of standing seam metal roofs are manifold. First and foremost, they are renowned for their longevity. These roofs can easily last 50 years or more, outperforming many other roofing materials. Their robust construction makes them highly resistant to extreme weather conditions, including heavy rain, snow, and hail. As a result, they offer superior protection for your property. Additionally, standing seam metal roofs are fire-resistant, which adds an extra layer of security for your home or building. Moreover, they require minimal maintenance, saving you time and money in the long run. One of the most notable advantages of these roofs is their energy efficiency. Their reflective surfaces can lower cooling costs during hot summers, making them an eco-friendly choice. Finally, their sleek, modern appearance can enhance the curb appeal and overall value of your property.
Types of Materials
Standing seam metal roofs are available in various materials, each with its unique characteristics. Common choices include steel, aluminum, copper, and zinc. Steel is a popular and budget-friendly option, known for its strength and resistance to corrosion. Aluminum, on the other hand, is lightweight and doesn’t rust, making it an ideal choice for coastal regions. Copper roofs exude elegance and develop a distinctive patina over time, while zinc is prized for its longevity and eco-friendliness. Your choice of material will depend on your budget, aesthetic preferences, and local climate conditions.
Different Panel Profiles
Another aspect that sets standing seam metal roofs apart is the variety of panel profiles available. These profiles determine the appearance of the roof and its performance. Some common profiles include the double lock, snap lock, and T-shaped designs. The double lock profile features two seams that fold over one another, providing excellent water resistance. Snap lock panels are user-friendly and easy to install, making them a popular choice for DIY enthusiasts. T-shaped profiles have a unique appearance with a raised seam at the center, adding a touch of architectural flair to your roof. Your selection of panel profile can influence the overall aesthetics and functionality of your standing seam metal roof, so it’s essential to choose the one that best suits your needs and preferences.
Planning and Preparation Of Metal Roof Installation
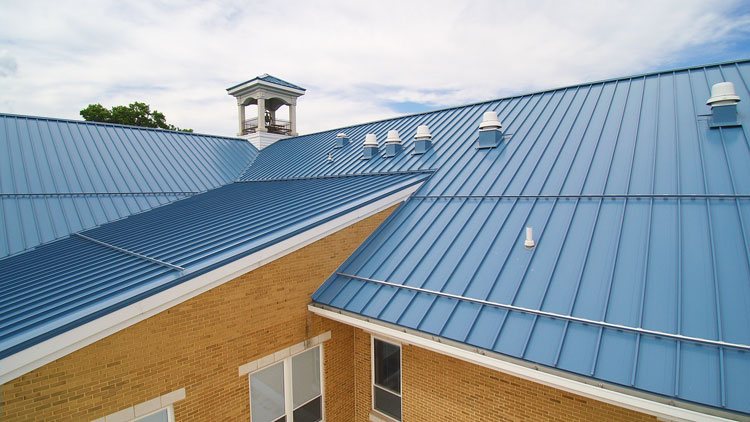
Proper planning and preparation are the cornerstones of a successful standing seam metal roof installation. Before you can dive into the actual installation process, you must take the time to assess your roof, measure and order the necessary materials, and acquire the essential tools. Let’s break down this crucial phase of the project:
Assessing Your Roof
The first step in your planning process is to assess the condition of your existing roof. Start by conducting a thorough inspection to identify any existing issues or damage. Look for signs of leaks, structural problems, or any areas that might need repairs. Addressing these issues before installing a standing seam metal roof is critical to ensure a stable and durable foundation for your new roofing system.
Next, consider the roof’s slope and pitch. Standing seam metal roofs are versatile and can be installed on a variety of roof types, but it’s essential to assess your roof’s characteristics to determine the most suitable installation method.
Measuring and Ordering Materials
Accurate measurements are vital when it comes to ordering materials for your standing seam metal roof. Start by measuring the dimensions of your roof precisely. Consider factors like overhangs and any additional areas that will require roofing materials.
Once you have these measurements, you can calculate the amount of standing seam metal panels, trim, and other components needed for your project. It’s advisable to add a small amount extra as a contingency for any unexpected waste or mistakes during the installation.
After determining your material requirements, you can proceed to order the standing seam metal panels and accessories. Ensure that you choose the right material type, color, and finish that align with your aesthetic preferences and climate considerations. Reputable suppliers can assist you in selecting the appropriate materials for your project.
Acquiring Necessary Tools
In addition to materials, you’ll need the right tools to complete your standing seam metal roof installation. While some tools are common to many DIY or construction projects, a few specific tools are essential for working with metal roofing. Some of the essential tools include:
- Safety Gear: Prioritize safety with equipment such as gloves, safety glasses, and a fall protection system when working at heights.
- Power Tools: Invest in a quality metal shear, a cordless drill with metal drill bits, and a nibbler for cutting and shaping metal panels.
- Hand Tools: Basic hand tools like a chalk line, tape measure, snips, and a roofing hammer are crucial for precise work.
- Seaming Tools: These specialized tools are needed for creating seams and ensuring watertight connections between panels.
- Ladders and Scaffolding: Depending on your roof’s design, you may require ladders or scaffolding to access different areas safely.
Proper planning and preparation, including roof assessment, precise measurements, material ordering, and tool acquisition, are fundamental steps that set the stage for a smooth and successful standing seam metal roof installation. By taking your time during this phase, you’ll be better equipped to tackle the actual installation process with confidence and efficiency.
Removing the Existing Roof
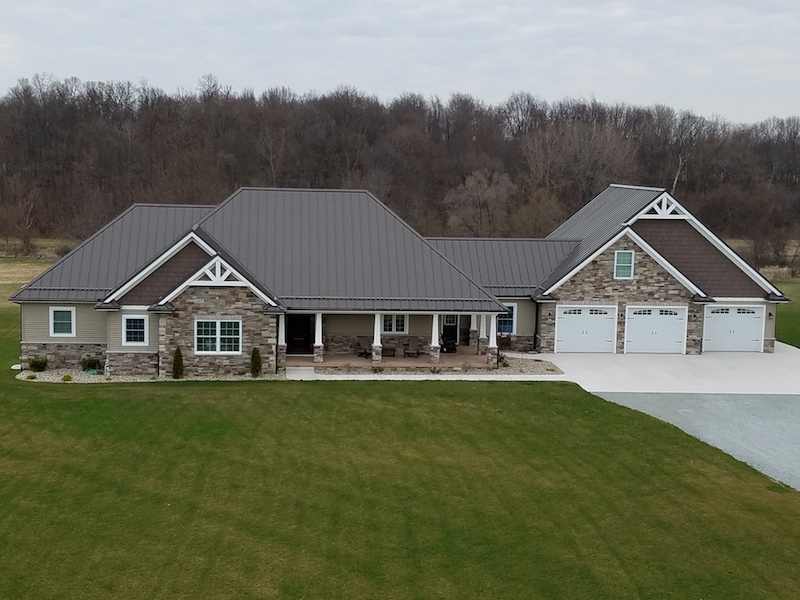
Before you can embark on the installation of your new standing seam metal roof, it’s essential to start with a clean slate. This means removing the existing roofing material and ensuring that the roof deck is in optimal condition. Let’s explore this crucial phase:
Removing Shingles or Existing Roofing Material
The first task is to remove the old roofing material, whether it’s shingles, asphalt, or another type of roofing. This step requires careful and systematic work to avoid damaging the underlying structure and to ensure a smooth surface for the new metal roofing.
- Tools and Safety Gear: Equip yourself with the necessary tools, including shingle shovels, roofing hammers, and a pry bar. Safety gear, such as gloves and safety glasses, is essential to protect yourself during this process.
- Systematic Removal: Begin at the highest point of the roof and work your way downward, removing shingles or existing roofing material one layer at a time. Use the shingle shovel or pry bar to lift and separate the material from the roof.
- Disposal: As you remove the old roofing material, have a plan for proper disposal. This may involve renting a dumpster or coordinating with a local waste disposal service.
- Inspect Underlayment: Once the old material is removed, inspect the underlayment and the roof deck for any damage or areas that require repair. Replace any damaged underlayment to ensure a sound foundation for the new roof.
Inspecting and Repairing the Roof Deck
The integrity of the roof deck is crucial for a successful standing seam metal roof installation. A solid deck ensures that the new roofing system will be properly supported and function effectively. Here’s what you need to do:
- Thorough Inspection: Examine the entire roof deck for signs of rot, water damage, or structural issues. Pay close attention to areas around vents, chimneys, and any roof penetrations.
- Addressing Issues: If you encounter damaged or rotted sections of the roof deck, replace or repair them as needed. This is a critical step to ensure the new metal roof has a stable and secure foundation.
- Sheathing and Deck Material: If you need to replace parts of the deck, select appropriate sheathing materials that align with local building codes and climate conditions. Common choices include plywood or oriented strand board (OSB).
- Secure Fasteners: Ensure that all fasteners, such as screws or nails, used to secure the sheathing to the roof framing are in good condition and properly anchored.
- Ventilation: Verify that the roof deck’s ventilation system is functioning correctly. Proper ventilation is essential for regulating temperature and moisture under the new metal roof.
By removing the existing roofing material carefully and inspecting and repairing the roof deck as needed, you’ll set the stage for a solid foundation on which to install your standing seam metal roof. This phase of the project is critical for the long-term performance and durability of your new roofing system.
Installing Roof Underlayment and Insulation
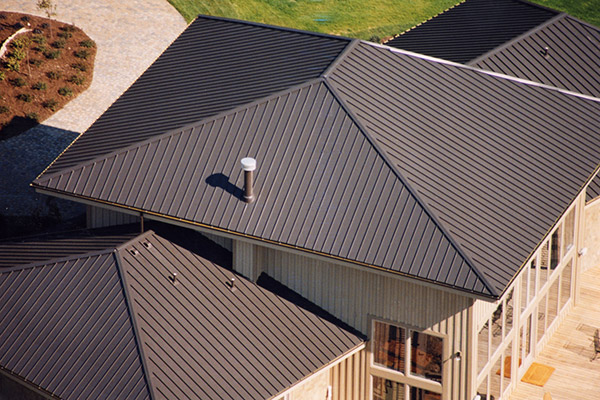
A crucial aspect of your standing seam metal roof installation involves preparing the roof deck for the metal panels. This phase consists of choosing the right underlayment, ensuring proper insulation, and making the necessary preparations for the panel installation. Let’s explore each step in detail:
Choosing the Right Underlayment
- Weather Barrier: Begin by selecting an appropriate underlayment. A weather-resistant barrier, such as synthetic underlayment or self-adhering roofing membrane, acts as a secondary layer of protection against moisture infiltration. This barrier is especially crucial in areas prone to heavy rain or snow.
- Breathability: Consider the climate and ventilation requirements of your region. Some underlayment materials offer breathability, allowing moisture to escape while still preventing water penetration.
Ensuring Proper Insulation
- Thermal Insulation: Proper insulation is essential for maintaining energy efficiency and controlling indoor temperatures. Choose insulation materials that suit your climate and provide the desired R-value for thermal resistance.
- Vapor Barrier: Depending on your climate, you may need a vapor barrier to control moisture and condensation within the insulation.
Preparing for Panels
Before you can begin installing the standing seam metal panels, you must prepare the roof deck and ensure it is ready for the next phase.
Preparing Eave and Gable Trim
- Flashing and Trim: Install eave and gable trim to provide a secure edge for the metal panels and to ensure a neat and finished appearance. Properly secured trim helps prevent wind-driven rain from entering the roofing system.
- Sealing Joints: Use appropriate sealant or butyl tape to seal joints, seams, and corners in the trim, creating a watertight barrier.
Installing Roofing Underlayment
- Layout and Cutting: Begin by laying out the underlayment material in manageable sections. Cut the material to fit your roof’s dimensions, making sure it overlaps appropriately to provide complete coverage.
- Fastening: Secure the underlayment with nails or staples, following the manufacturer’s guidelines for spacing and fastener type. Ensure that there are no wrinkles or bubbles in the underlayment.
Panel Installation
Now that your roof deck is prepared with the underlayment and insulation in place, it’s time to install the standing seam metal panels.
Installing the First Panel
- Starting Point: Choose the starting point for panel installation, typically along the eave or gutter edge. Secure the first panel, ensuring it is level and correctly aligned with the eave trim.
- Fastening: Use the appropriate concealed fasteners, which are typically attached to the vertical leg of the standing seam panel. Avoid overtightening the fasteners to allow for thermal expansion and contraction.
Attaching Subsequent Panels
- Interlocking Panels: Position the next panel so that it interlocks with the first panel, creating a continuous seam. Secure it in place with concealed fasteners.
- Alignment and Overlap: Ensure that each subsequent panel aligns properly and overlaps according to the manufacturer’s recommendations. This creates a watertight seal and maintains the roof’s sleek appearance.
Seaming Panels
- Mechanical Seaming: Depending on the design of your standing seam panels, you may need to mechanically seam the panels together using a specialized seaming tool. This process creates a secure, waterproof connection between panels.
- Quality Checks: Throughout the panel installation, perform regular quality checks to ensure panels are correctly aligned, fastened, and seamed. Address any issues promptly to maintain the roof’s integrity.
By installing the underlayment, insulation, and preparing the roof for panel installation in a systematic and precise manner, you’re setting the stage for a successful standing seam metal roof project. These critical steps contribute to the roof’s energy efficiency, protection, and overall performance.
Flashing and Trim Details
Proper flashing and trim details are essential to maintain the integrity and weatherproofing of your standing seam metal roof. This phase focuses on using flashing to seal penetrations, installing ridge and eave flashing, ensuring proper trim installation, and understanding fasteners and roof attachment methods.
Using Flashing to Seal Penetrations
- Sealing Roof Penetrations: Any roof penetration, such as chimneys, vents, or skylights, requires proper sealing to prevent water infiltration. Utilize specialized flashing designed for the specific penetration and ensure it is securely attached and sealed with appropriate sealant.
Installing Ridge and Eave Flashing
- Eave Flashing: Install eave flashing along the roof’s lower edge, creating a barrier to prevent water from seeping under the panels.
- Ridge Flashing: Ridge flashing, placed at the roof’s peak, provides a watertight seal and enhances the roof’s appearance.
Proper Trim Installation
- Trim Components: Use trim components to cap and protect the edges of your standing seam metal roof. Proper installation is essential to prevent wind-driven rain from entering the roofing system.
- Sealant Application: Apply sealant or butyl tape to seal joints and seams in the trim, ensuring a watertight barrier.
Fasteners and Roof Attachment
Choosing the right fasteners and understanding their placement is critical to the performance of your standing seam metal roof.
Concealed vs. Exposed Fasteners
- Concealed Fasteners: Concealed fasteners provide a sleek and clean appearance, as they are hidden beneath the panels. They reduce the risk of leaks and are commonly used for standing seam metal roofs.
- Exposed Fasteners: Exposed fasteners are visible and typically used in other types of metal roofing. They require careful installation to ensure water-tightness.
Proper Fastener Installation
- Spacing and Tightening: Ensure that fasteners are spaced according to the manufacturer’s recommendations and tightened appropriately. Avoid over-tightening to accommodate for thermal expansion and contraction.
Hip and Ridge Cap Installation
Finishing the roof with hip and ridge caps enhances both the aesthetics and functionality of your standing seam metal roof.
Preparing for Hip and Ridge Caps
- Measuring and Cutting: Measure the length of the hip and ridge caps and cut them to the appropriate size.
- Applying Sealant: Apply sealant to the underside of the hip and ridge caps to create a secure and watertight seal.
Installing Hip and Ridge Caps
- Placement: Position the hip and ridge caps over the roof’s peak, ensuring they interlock with the standing seam panels.
- Fastening: Secure the hip and ridge caps in place using concealed fasteners, maintaining a watertight seal.
End Caps and Gable Trim
Completing your standing seam metal roof involves addressing the ends and gable areas for a polished look.
Preparing and Installing End Caps
- End Cap Installation: End caps are installed to seal the ends of the standing seam panels, ensuring water does not penetrate the edges.
Adding Gable Trim for a Finished Look
- Gable Trim Installation: Installing gable trim along the gable ends adds a polished appearance and enhances weather resistance.
Completing the Installation
As you near the finish line of your standing seam metal roof project, there are a few more steps to ensure everything is in order.
Final Inspections and Touch-Ups
- Quality Check: Conduct a thorough inspection to ensure all components are properly installed and sealed. Address any issues, such as loose fasteners or unsealed joints.
- Touch-Ups: Make any necessary touch-ups to sealants and fasteners to maintain the roof’s watertight integrity.
Cleaning and Maintenance Tips
- Cleaning: Understand how to clean and maintain your standing seam metal roof to preserve its appearance and longevity. Regular cleaning can help prevent dirt and debris buildup.
Quality Assurance and Professional Assistance
Even if you’re a skilled DIY enthusiast, there are times when professional assistance may be necessary to ensure the highest standards of quality and safety.
Ensuring the Installation Meets Standards
- Compliance: Ensure that your installation complies with local building codes and manufacturer guidelines. Non-compliance could lead to issues down the road.
When to Seek Professional Help
- Complex Issues: If you encounter complex problems during the installation, or if you’re unsure about a particular aspect, it’s wise to consult a professional contractor or roofing expert to avoid potential errors.
By completing these final stages of your standing seam metal roof installation with precision and attention to detail, you’ll have a roof that not only looks stunning but also offers exceptional protection and performance. Regular maintenance and adherence to best practices are key to ensuring your investment stands the test of time.
Cost Considerations
Installing a standing seam metal roof offers a wealth of benefits, from longevity and durability to enhanced aesthetics and energy efficiency. However, like any home improvement project, cost considerations are an important factor in your decision-making process. Let’s dive into how to estimate the cost of a standing seam metal roof for your property.
Estimating the Cost of a Standing Seam Metal Roof
- Roof Size: The size of your roof is a significant determinant of the overall cost. A larger roof will require more materials, labor, and time for installation, thus increasing the project’s cost.
- Material Choice: The material you choose for your standing seam metal roof plays a pivotal role in cost. Copper and zinc are premium options and tend to be more expensive, while steel and aluminum are more budget-friendly.
- Roof Complexity: The complexity of your roof’s design influences the cost. Roofs with multiple angles, slopes, and features like skylights or dormers may require more labor and materials.
- Roof Pitch: The pitch or slope of your roof can impact the cost. Steeper roofs may require additional safety measures and can be more challenging to install.
- Location: Local factors, including labor costs, building codes, and permitting requirements, can vary by region, influencing the overall cost.
- Insulation and Underlayment: The quality and type of insulation and underlayment used affect the cost. Proper insulation is essential for energy efficiency and moisture protection.
- Finish and Coating: The finish and coating options, such as paint or protective coatings, can also impact the cost. Premium finishes may cost more but provide enhanced durability and aesthetics.
- Installation Method: There are different installation methods for standing seam metal roofs, including concealed fastener and exposed fastener systems. Concealed fastener systems often cost more but provide a sleeker appearance.
- Labor Costs: Labor costs for installation can vary based on the experience and expertise of the roofing contractor. Choose a reputable contractor who can deliver high-quality work.
- Additional Features: Extra features like snow guards, gutters, and downspouts can add to the overall cost of the roofing project.
By considering these factors and obtaining detailed quotes from professional roofing contractors, you can create a budget that aligns with your needs and preferences. When estimating the cost, it’s crucial to balance your budget with the long-term benefits that a standing seam metal roof offers, including energy savings, durability, and enhanced property value.
For a precise and personalized cost estimate for your standing seam metal roof project, we invite you to contact Nordic Metals & Fab. Our team of experts is ready to provide you with free quotes and guide you through the process of transforming your property with a stylish and enduring roofing solution. Make the right investment in your home today. Contact us to get started.

0 Comments